Exploring Warp Terminal's AI Capabilities - Part 1
In this post, let's explore the Warp terminal's AI capabilities. Warp terminal allows users to enter commands in natural language (plain English), and, in turn, figures out the sequence of commands to be executed.
For the purpose of this demo, let's try to create a Java application with Gradle as the build tool. To make the task slightly more challenging, let's ensure that Gradle is not installed on the system.
Let's use the following natural language command - "Create a Java console application with Gradle build. Use Java version 17. Let the root package be "com.nareshak.demo". Use Groovy DSL. Use JUnit Jupiter for testing."
Let's ensure Gradle is not available in our system.
➜  p4 gradle --version
zsh: command not found: gradle

The Warp terminal allows us to choose between creating a plan with a thinking model and proceeding without one. Let's not use the thinking model in this attempt. Note that using a thinking model will consume additional tokens and, hence, incur a higher cost. Of course, using a thinking model might bring in extra benefits.

The Warp terminal has prepared a command and asks for our permission to execute it here. Let's allow Warp to run the command.
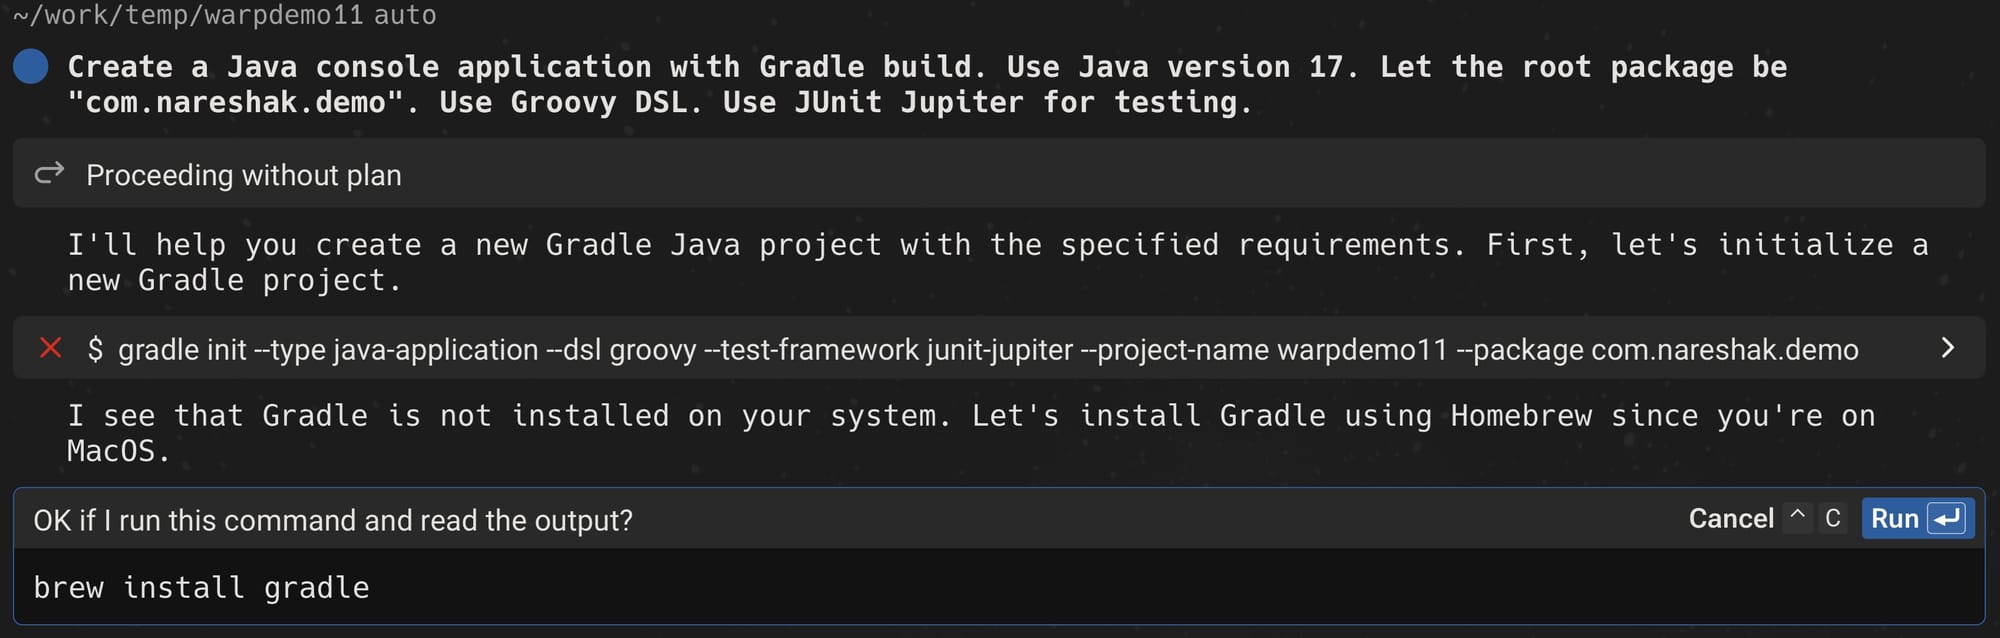
Since Gradle is not installed on the system, Warp cannot run the command gradle init. Note that Warp didn't figure this out before running the command. The LLM under the hood just decided the most common way of creating a project using Gradle.
However, it is good to note that based on the command's failure message, it figured that out. It also suggested a way of installing the Gradle tool on my system. Also note that it figured out that I am using MacOS and suggested one of the best ways of managing tools on Mac, that is, using Homebrew.
However, I prefer to manage my Java project-related tools with SDKMan. Hence, let's cancel the flow and retry the same natural command with the thinking model option.
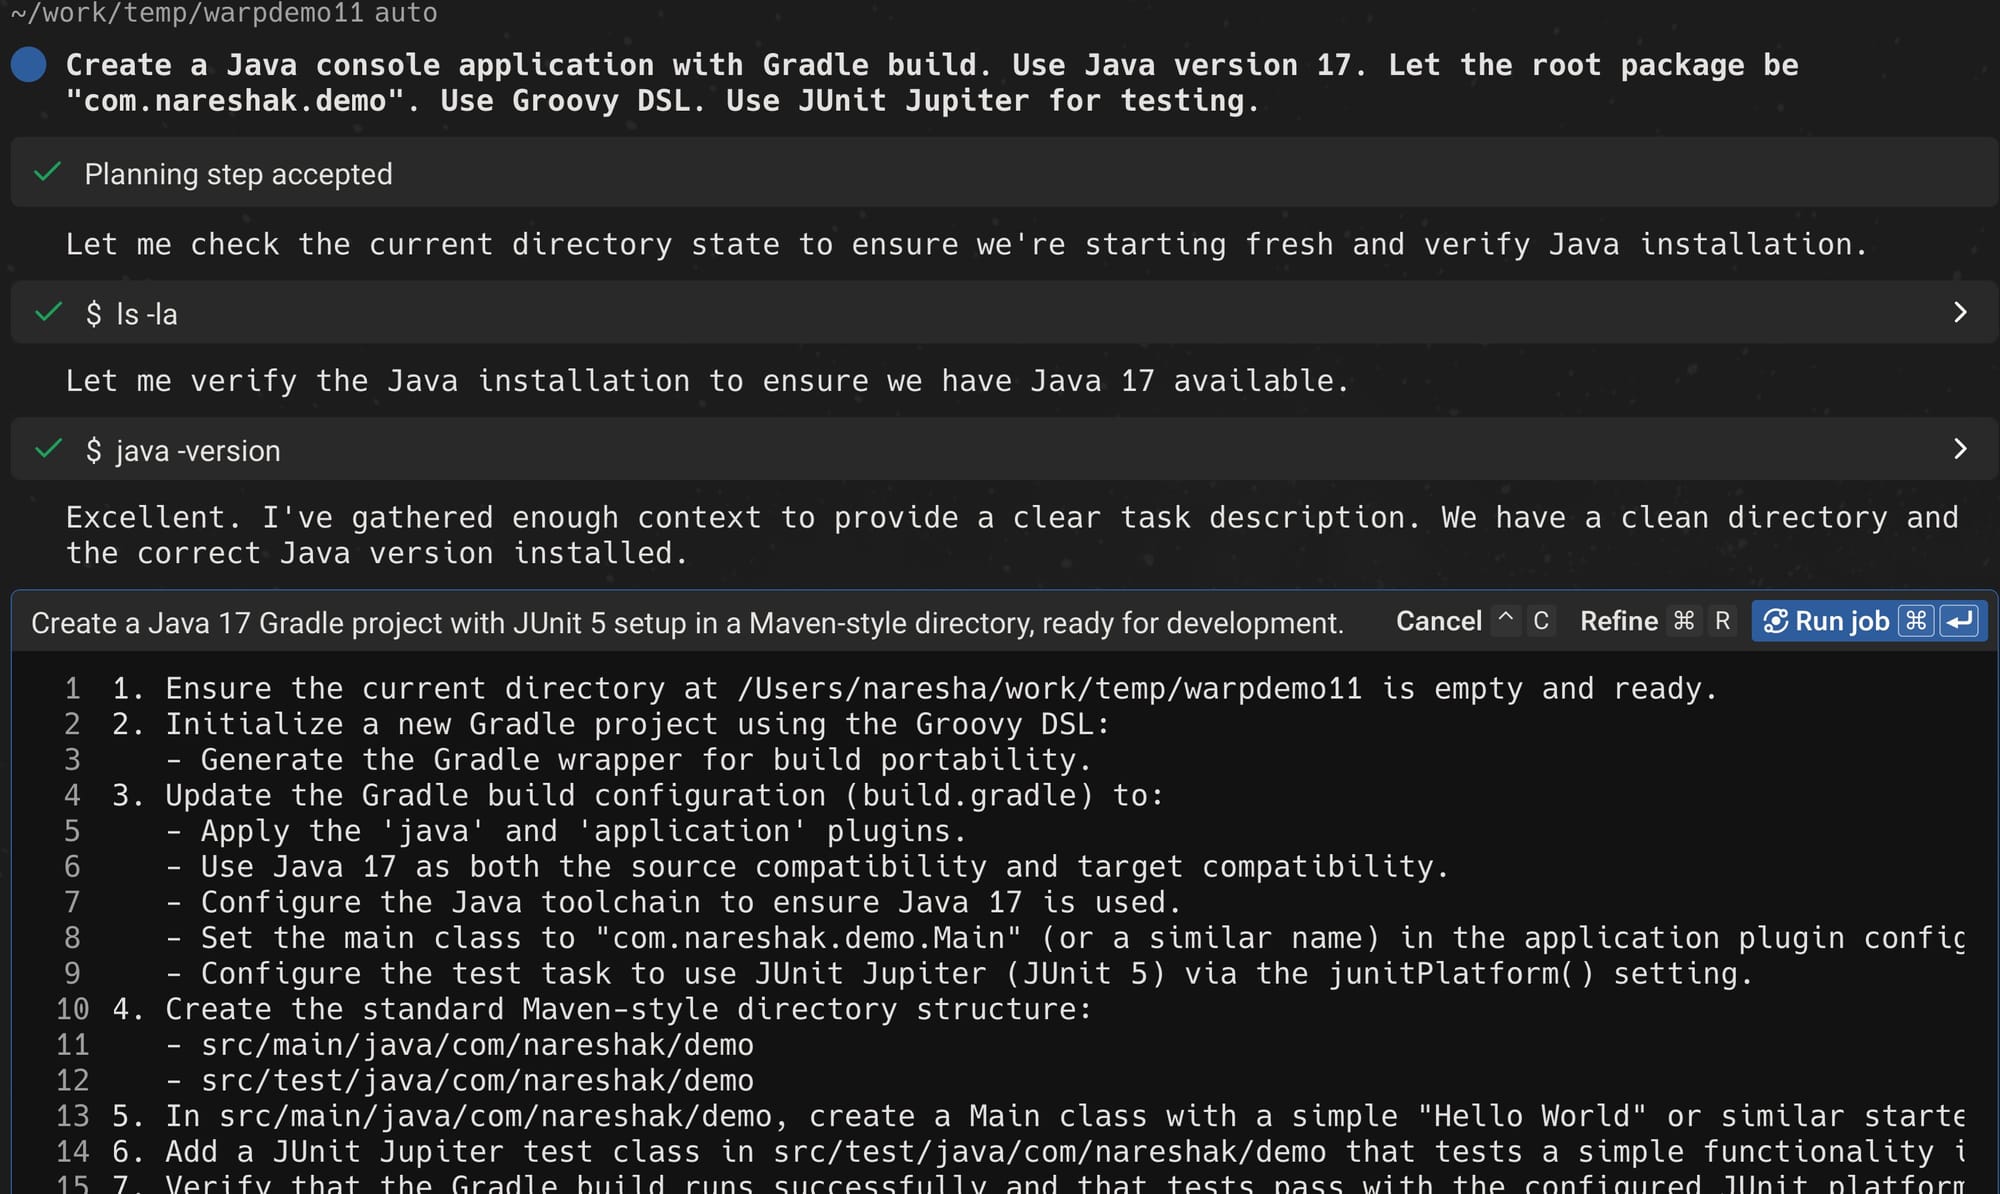
In this case, Warp has decided to take control instead of using the gradle init command. This means it will perform all the necessary steps that the gradle init command would perform. Let's allow the Warp terminal to proceed with the plan.
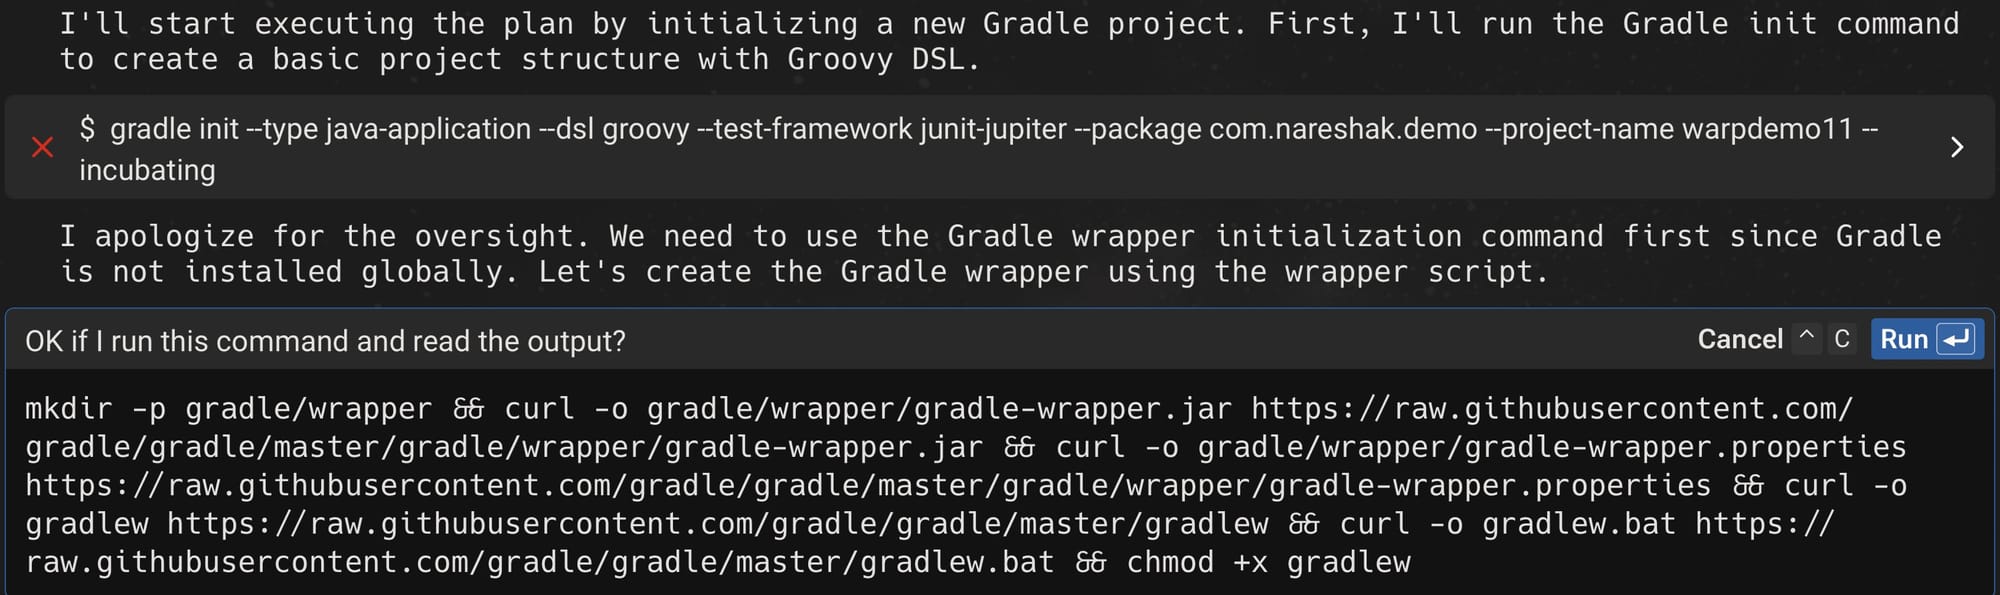
To set up the Gradle wrapper, it is trying to download the necessary files (gradle-wrapper.jar, gradle-wrapper.properties, and gradlew shell script) from Gradle's repository.
It is interesting to note that Warp makes an assumption that we wan't the latest version of those files.
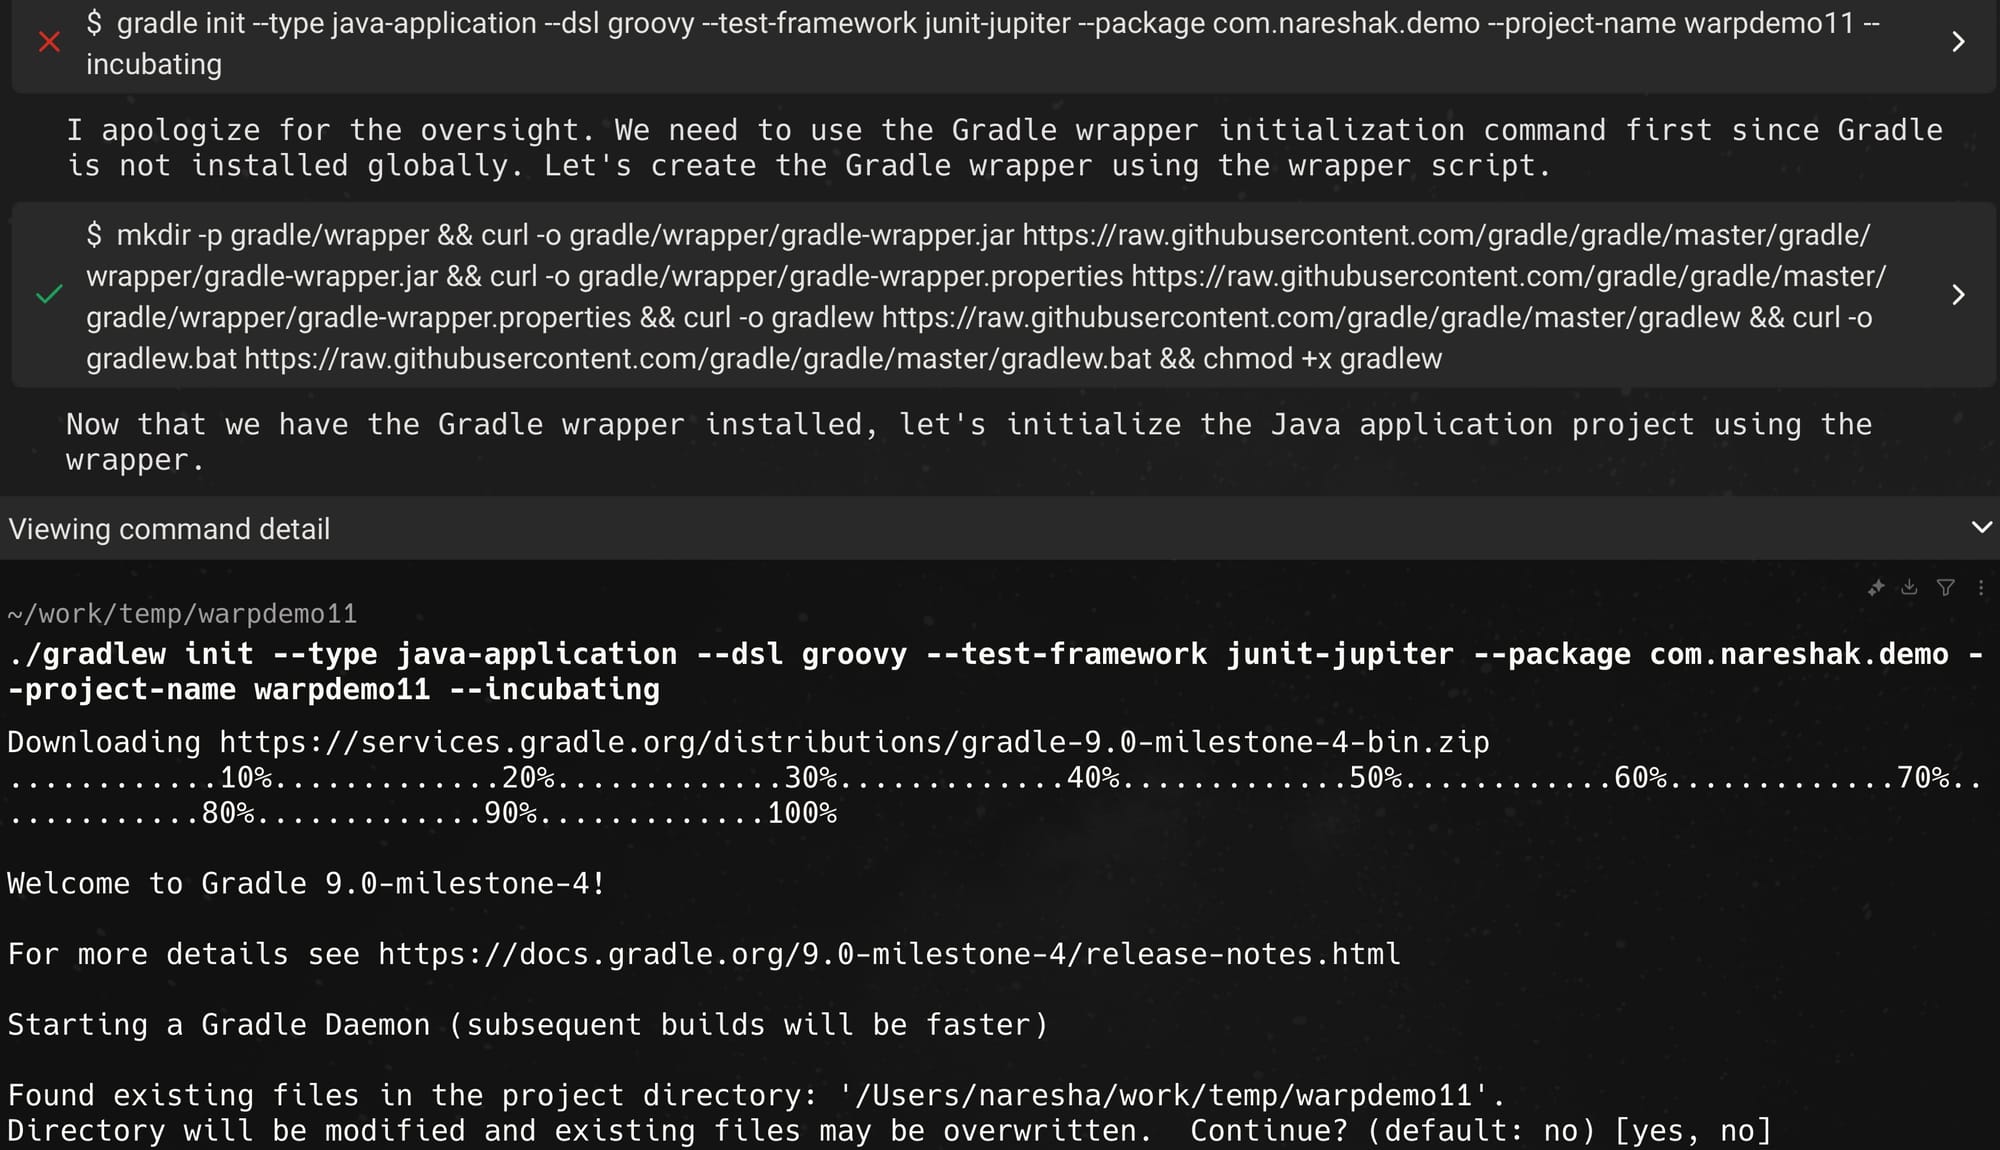
After downloading the Gradle Wrapper, it runs the shell script gradlew with init arguments. Since it downloaded the latest wrapper files, we see that we are getting the latest snapshot version of Gradle.
The gradlew init command gets into interactive mode to get additional arguments from the user. Ideally, Warp should have passed those as the command-line arguments. But it didn't. Hence, the interactive mode was necessary.
./gradlew init --type java-application --dsl groovy --test-framework junit-jupiter --package com.nareshak.demo --project-name warpdemo11 --incubating --overwrite

Enter target Java version (min: 7, default: 21): 17

Select application structure:
  1: Single application project
  2: Application and library project
Enter selection (default: Single application project) [1..2] 1


> Task :init
Learn more about Gradle by exploring our Samples at https://docs.gradle.org/9.0-milestone-4/samples/sample_building_java_applications.html

BUILD SUCCESSFUL in 3m 29s
1 actionable task: 1 executed
Great! The project has been initialized successfully with Java 17 and JUnit Jupiter. Let's verify the project structure and configuration files to ensure everything is set up correctly.
The project structure looks good. Let's examine and update the build configuration to ensure it meets our requirements.
/Users/naresha/work/temp/warpdemo11/app/build.gradle
The build.gradle file is mostly well-configured, but let's verify the main application code and test code to ensure they provide a good starting point.
/Users/naresha/work/temp/warpdemo11/app/src/main/java/com/nareshak/demo/App.java
/Users/naresha/work/temp/warpdemo11/app/src/test/java/com/nareshak/demo/AppTest.java
The project is well-structured and includes all the required components. Let's verify that everything works by running the build and tests.
cd app && ../gradlew build
Calculating task graph as no cached configuration is available for tasks: build

BUILD SUCCESSFUL in 8s
7 actionable tasks: 7 executed
Configuration cache entry stored.
Perfect! The project has been successfully created and configured with all requirements met:

1. Uses Java 17 (configured in build.gradle)
2. Uses Gradle with Groovy DSL
3. Includes JUnit Jupiter for testing
4. Has proper package structure (com.nareshak.demo)
5. Contains a working main application and test
6. Build succeeds and tests pass

Would you like to try running the application to verify it works? You can do this using the 'run' task, or would you like to see any specific part of the configuration in more detail?
I apologize for the confusion. We're already in the app directory from the previous command. Let's run the application from the current location.
I apologize for the confusion. We need to run the command from the root project directory where the gradlew script is located.
Excellent! The project is now completely set up and working as expected. Here's a summary of what we've accomplished:

1. Created a Gradle project with Groovy DSL
2. Configured Java 17 as the target version
3. Set up JUnit Jupiter for testing
4. Created the proper package structure (com.nareshak.demo)
5. Included a working main application that prints "Hello World!"
6. Added a basic test case that passes
7. Verified both build and run functionality

The project is ready for further development. Would you like to:
1. See any specific configuration details?
2. Make any modifications to the current setup?
3. Add more functionality to the application?

Please let me know if you need any additional assistance!
Initially, it fails to run the commands from the correct directory, but it eventually figures out the mistake and corrects it. Towards the end, we are presented with a summary of everything done as per the AI-generated plan.
Now we have our project structure for a Java application.
If you want to learn more about the init command of Gradle, I have already written a post about it here.